I could not go through the entirety of 2010 without having this babka again. It is delicious and made for a wonderful New Year's Eve breakfast. The kids were all excited to have it and didn't even know what it was... Benjamin: "Yay! Babka! ...Is it a drink?" I'm glad to have lived up to their expectations; they both loved it. But how could you not? It's bread with a chocolate swirl and sweet streusel.
Chocolate Babka
Courtesy of Cooking Light
Dough:
1 teaspoon granulated sugar
1 package dry yeast (about 2 1/4 teaspoons)
3/4 cup warm 1% low-fat milk (105° to 110°)
6 tablespoons granulated sugar
1/2 teaspoon vanilla extract
1/4 teaspoon salt
1 large egg yolk, lightly beaten
7.5 ounces all-purpose flour (about 1 2/3 cups), divided
5.85 ounces bread flour (about 1 1/4 cups)
5 tablespoons butter, cut into pieces and softened
Cooking spray
Filling:
1/2 cup granulated sugar
3 tablespoons unsweetened cocoa
1/2 teaspoon ground cinnamon
1/4 teaspoon salt
4 ounces semisweet chocolate, finely chopped
Streusel:
2 tablespoons powdered sugar
1 tablespoon all-purpose flour
1 tablespoon butter, softened
Dissolve 1 teaspoon granulated sugar and yeast in warm milk in the bowl of a stand mixer; let stand 5 minutes. Stir in 6 tablespoons granulated sugar, vanilla extract, 1/4 teaspoon salt, and egg yolk. Weigh or lightly spoon flours into dry measuring cups; level with a knife. Add 6 ounces (about 1 1/3 cups) all-purpose flour and bread flour to milk mixture; beat with dough hook attachment at medium speed until well blended (about 2 minutes). Add 5 tablespoons butter, beating until well blended. Scrape dough out onto a floured surface (dough will be very sticky). Knead until smooth and elastic (about 10 minutes); add 1.5 ounces (about 1/3 cup) all-purpose flour, 1 tablespoon at a time, to prevent dough from sticking to hands (dough will be very soft).
Place dough in a large bowl coated with cooking spray, turning to coat top. Cover and let rise in a warm place (85°F), free from drafts, 1 1/2 hours or until doubled in size. (Gently press two fingers into dough. If indentation remains, dough has risen enough.) Punch dough down; cover and let dough rest 5 minutes.
Line the bottom of a 9 x 5–inch loaf pan with parchment paper; coat sides of pan with cooking spray.
To prepare filling, combine 1/2 cup granulated sugar, cocoa, cinnamon, salt, and chocolate in a medium bowl; set aside.
Place dough on a generously floured surface; roll dough out into a 16-inch square. Sprinkle filling over dough, leaving a 1/4-inch border around edges. Roll up dough tightly, jelly-roll fashion; pinch seam and ends to seal. Holding dough by ends, twist dough 4 times as if wringing out a towel. Fit dough into prepared pan. Cover and let rise 45 minutes or until doubled in size.
Preheat oven to 350°F.
To prepare streusel, combine powdered sugar, 1 tablespoon all-purpose flour, and 1 tablespoon softened butter, stirring with a fork until mixture is crumbly; sprinkle streusel evenly over dough. Bake for 40 minutes or until loaf is browned on bottom and sounds hollow when tapped. Cool bread in pan 10 minutes on a wire rack; remove from pan. Cool bread completely on wire rack before slicing.
Please enjoy my trials and triumphs with one of the things I love the most -- food!
Friday, December 31, 2010
Thursday, December 30, 2010
Chocolate-Pumpkin Marble Cake
I brought this deliciousness to my in-laws' Christmas gift exchange. And it was a huge hit. My husband, who usually can't handle too many sweet things, and certainly rarely overindulges in such things, had two pieces within a 20-minute period. Score.
Chocolate-Pumpkin Marble Cake
Courtesy of Sunset
For the cake:
1 1/2 cups (3/4 pound) unsalted butter, at room temperature
3 cups sugar
6 large eggs
2 teaspoons vanilla
1 1/4 cups canned pumpkin
2 3/4 cups all-purpose flour
2 teaspoons baking powder
1 teaspoon salt
1/2 teaspoon ground cinnamon
1/4 teaspoon ground nutmeg
1/8 teaspoon ground cloves
3/4 cup Dutch-processed unsweetened cocoa
2/3 cup buttermilk
For the glaze:
4 ounces semisweet chocolate, chopped
1/2 cup whipping cream
1 tablespoon unsalted butter
1 teaspoon corn syrup
1/2 cup chopped roasted, unsalted peanuts (optional)
In a large bowl, with a mixer on medium speed, beat butter and sugar until well blended. Add eggs, one at a time, beating well after each addition. Beat in vanilla. Scrape half the mixture into another bowl.
To make pumpkin batter: Beat pumpkin into half the butter mixture until well blended. In another bowl, stir together 1 3/4 cups flour, 1 teaspoon baking powder, 1/2 teaspoon salt, cinnamon, nutmeg, and cloves. Add flour mixture to pumpkin mixture and beat on low speed or fold in with a flexible spatula just until blended.
To make chocolate batter: In another bowl, mix remaining 1 cup flour, 1 teaspoon baking powder, 1/2 teaspoon salt, and the cocoa. Add flour mixture alternately with the buttermilk to the other half of the butter mixture (starting and ending with flour mixture), beating after each addition just until blended.
Spoon half the pumpkin batter into a buttered and floured 12-cup bundt-cake pan. Drop half the chocolate batter by spoonfuls over (but not entirely covering) the pumpkin batter. Repeat to spoon remaining pumpkin and chocolate batters into pan. Gently run the blade of a butter knife around the center of the pan several times, then draw the knife across the width of the pan in 10 to 12 places to swirl batters.
Bake in a 350°F regular or 325°F convection oven until a wood skewer inserted into center of cake comes out with a few moist crumbs attached, 55 to 60 minutes. Let cake cool 10 minutes in pan, then invert onto a rack, lift off pan, and cool cake completely.
Meanwhile, in a heatproof bowl or the top of a double boiler, combine chocolate, whipping cream, butter, and corn syrup. Bring an inch or two of water to a boil in a pan that the bowl can nest in or in bottom of double boiler, then remove from heat. Place chocolate mixture over water and let stand, stirring occasionally, until melted and smooth, about 10 minutes.
Pour warm chocolate glaze over the top of the cake, letting it drip down the sides. Sprinkle glaze with peanuts if desired. Let stand until glaze is set, about 2 hours, or chill about 30 minutes.
Monday, December 27, 2010
Cranberry Rosemary Digestif
Meh. Apparently, whiskey is not my libation of choice. I will be using the rest of the digestif base to liven up my sparkling water. But if you like whiskey, then this is for you.
Sunny's Family Therapy Cranberry Rosemary Digestif
Courtesy of Sunny Anderson
For the cranberry syrup:
1/2 cup water
1 cup cranberries
1 cup sugar
3-inch cinnamon stick
2 sprigs rosemary
Pinch salt
1 lemon, zested
For the drinks:
Ice
200 ml bottle whiskey
Add the water, cranberries, sugar, cinnamon stick, rosemary, salt and lemon zest to a medium saucepan. Bring to a boil over medium heat. Lower the heat and simmer until slightly reduced in volume and thickened to a syrup. Remove from the heat and strain through a fine mesh sieve into a bowl. Discard the solids. Refrigerate until cool, about 30 minutes.
To make a drink: Put a handful of ice in a drink shaker along with 1 1/2 ounces of whiskey and 1 tablespoon of the cranberry syrup. Shake gently a few times and strain into a glass. Repeat for the remaining drinks and serve.
Christmas Dinner 2010 (Brussels Sprouts with Pancetta, Mushroom-Leek Stuffing Muffins, Parker House Rolls, Cranberry Sauce, and Pumpkin Maple Pie)
Christmas 2010 will not be forgotten... I bought my first fresh turkey from Wolff's Apple House. I found a wonderful recipe for it. I brined it with the tried-and-true Alton Brown's Good Eats recipe. I didn't make a mess while getting the turkey ready, like I have in the past. I was organized and ready to go. The turkey went into the oven. I used the neck and giblets to start a gravy base that smelled amazing. I had the veggies pre-chopped for the sides. The rolls had been set up ahead of time and frozen. I had a timeline up on my dry-erase board in the kitchen. I had the serving platters set out on my beautifully set table. I had all of my utensils and other preparation accouterments ready. I was on top of everything...
And then...
The electricity went out.
And stayed out.
The turkey was almost 2 hours from being done. And the gravy base was only halfway done. And I had a ton of stuff in my fridge, for the meal as well as stocked up for the week. The electric company's automated system said that we weren't due to have our electricity back on until at least 3 hours after it had shut off.
Needless to say, I was really upset. I was far more disappointed about it than they were, but I was sad to disappoint my guests. Especially my unofficially-adopted brother-in-law from Austria, who, since he isn't able to be here for Thanksgivings, had been looking forward to a traditional American holiday meal.
I had been really excited about preparing this meal. And, as I mentioned, I was feeling very organized and ready. I had spent quite a bit of money on the whole thing. And even though it was far from being done, the turkey was gorgeous. It ended up being thrown in the woods, where Jonathan said he heard very large footsteps. So presumably, we made a very nice Christmas turkey for some happy deer, while we dined on Wawa take-out.
Since our fridge/freezer supplies survived (thank goodness), I ended up making the planned sides the following evening. And I have to say that I was actually a bit disappointed in some of them. (A silver lining in this Christmas dinner disaster story? I'm certainly choosing to look at it that way.) The Brussels sprouts were not as crispy as I wanted them to be and lacked some flavor. And the stuffing muffins, while a pretty good idea, were very difficult to actually dig out of the muffin cups. I have a whole load as leftovers, so I'm interested to see if they're like other muffins and are easier to get out of the cups once they've cooled. I also wasn't happy with how mushy they were. I did end up baking off some of the stuffing mixture in a pan in order to compare texture, so I'm anxious to see if it tastes better when prepared in the more "traditional" manner.
The rolls, however, were wonderful. And the cranberry sauce was delightful. And the two together? Well, that's a recipe for a delicious post-holiday breakfast and/or snack, which I will be taking advantage of as long as the leftovers last.
I made two kinds of pumpkin pie, the apple butter pumpkin pie I made before and a pumpkin maple one. I was very excited to "pass around the coffee and the pumpkin pie", but instead, the morning after our Christmas dinner disaster, I had them for breakfast. While both are delightful, the maple one was my favorite. The maple flavor really kind of sneaks up on you and gives the pie such a warm and full flavor.
So there's Christmas Dinner 2010. It's one for our family history book. I'm not quite ready to laugh about it yet, but I'm sure some day I will be.
Brussels Sprouts with Pancetta
A variation on this recipe from Cooking Light
2 1/2 pounds Brussels sprouts, trimmed
1 tablespoon kosher salt
1/2 cup chopped pancetta (about 4 ounces)
1 shallot, diced
1/4 teaspoon kosher salt
1/4 teaspoon freshly ground black pepper
1 tablespoon cider vinegar
Preheat oven to 450°F.
Cook Brussels sprouts and 1 tablespoon salt in boiling water 6 minutes or until almost tender. Drain and plunge into ice water; drain well.
Cook pancetta in a large skillet over medium-low heat until crisp, stirring occasionally. Remove pancetta from pan, reserving drippings.
Cut Brussels sprouts in half lengthwise; place on a baking sheet. Add reserved drippings, shallots, 1/4 teaspoon salt, and pepper; toss to coat. Bake for 15 minutes or until browned, stirring after 10 minutes. Combine Brussels sprouts, pancetta, and vinegar in a large bowl; toss well.
**********************************************************
Mushroom-Leek Stuffing Muffins
Courtesy of Food Network Magazine
1 stick unsalted butter
3 cups leeks, chopped
2 cups celery, diced
1 pound cremini mushrooms, sliced
1 tablespoon rosemary, minced
1 tablespoon thyme, minced
Salt
Black pepper
3 cups turkey or chicken broth
2 eggs
1/4 cup parsley, chopped
16 cups white bread, cubed and stale
Melt butter in a large skillet over medium heat. Add leeks, celery, mushrooms, rosemary, and thyme; add salt and pepper and cook 5 minutes. Add broth and bring to a simmer. Beat eggs with parsley in a large bowl; add bread, then pour in the vegetable-broth mixture and toss.
Line muffin cups with paper liners and fill with stuffing. Bake, uncovered, at 375°F until golden, about 45 minutes.
(If you would like to make "traditional" stuffing, transfer stuffing mixture to a buttered baking dish and dot with butter. Cover and bake 30 minutes at 375 degrees F; uncover and bake until golden, 30 more minutes.)
**********************************************************
Parker House Rolls
Courtesy of Alex Guarnaschelli
1 1/4-ounce packet active dry yeast
1/2 cup sugar
7 1/2 to 8 cups all-purpose flour, plus more for dusting
12 tablespoons (1 1/2 sticks) unsalted butter, melted and cooled, plus softened butter for brushing
2 cups whole milk, at room temperature
2 large eggs, at room temperature
1 tablespoon kosher salt, plus more for sprinkling
Bloom the yeast: Measure out 1/2 cup warm water and check the temperature: It should be between 110°F and 120°F (comfortable bathwater temperature). Sprinkle the yeast into a large bowl, add the warm water and whisk in the sugar. Let sit 1 minute (it should bubble and froth slightly), then gently stir in 1 cup flour. Set aside near the stove while you prepare the dough.
Make the dough: Mix the melted butter and milk in a mixer with the hook attachment on low speed. Add the eggs and mix until blended. Scrape in the yeast mixture and mix until incorporated. Add 6 1/2 cups flour and 1 tablespoon salt; mix until the dough forms a ball, 2 to 3 minutes, adding up to 1/2 cup more flour if the dough is too wet and sticky.
Let it rise: Brush a large bowl with softened butter. Transfer the dough to the bowl, cover with a towel and let rise in a warm place, 2 hours to 2 hours, 30 minutes. The dough should double in volume.
Shape the dough: Preheat the oven to 375°F and line a baking sheet with parchment paper. Dust a clean flat surface with flour and turn the dough out onto it. Flour your hands; gently press the dough into a 16-by-8-inch rectangle, about 1/2 to 3/4 inch thick (don't use a rolling pin).
Cut the dough: With the short side in front of you, cut the dough in half lengthwise with a floured knife. Then slice crosswise into 12 strips.
Shape the dough: One at a time, fold each strip of dough unevenly in half so the top part slightly overlaps the bottom half, then tuck the overhang underneath. Place the rolls seam-side down on the prepared baking sheet in 3 tightly packed rows. (If making in advance, wrap the baking sheet tightly in plastic wrap and freeze up to 3 weeks.)
Bake the rolls: Bake until the rolls are bursting at the seams and golden brown, 18 to 20 minutes. (If frozen, bake 25 minutes at 325°F, then 10 minutes at 375°F.) Remove from the oven and brush with softened butter. Sprinkle with salt and serve immediately.
**********************************************************
Cranberry Sauce
Courtesy of Alex Guarnaschelli
1 pound fresh cranberries, washed and dried
2 cups granulated sugar
1/3 cup water
1 cinnamon stick
1/2 teaspoon ground allspice
1/4 teaspoon ground nutmeg
1 orange, zested and juiced
In a medium pot, combine the cranberries, sugar and water. Stir to blend. Bring the mixture to a boil over medium heat. Reduce to a simmer and add the cinnamon stick, allspice and nutmeg. Stir to blend and simmer for an additional 5 to 7 minutes. Some of the cranberries will burst and some will remain whole. Add the orange juice and zest, stir and allow to cool before serving.
**********************************************************
Pumpkin Maple Pie Supreme
Courtesy of AllRecipes.com
1 small sugar pumpkin
3/4 cup packed brown sugar
1 1/4 teaspoons ground cinnamon
1 teaspoon ground ginger
1 teaspoon ground nutmeg
1/4 teaspoon ground cloves
1/8 teaspoon ground allspice
1/2 teaspoon salt
2/3 cup real maple syrup
1 1/4 cups half-and-half cream
1 teaspoon all-purpose flour
3 eggs
1 (9-inch) unbaked pie shell
Preheat oven to 375°F (190°C).
Cut up pumpkin, and remove seeds. Place in large baking pan, and cover with foil or lid. Bake for 1 hour, or until very tender. Remove from oven, and set aside to cool. Reduce oven temperature to 350°F (175°C).
Scrape pumpkin into a food processor; puree until smooth. Measure 1 1/2 cups pumpkin puree. In a large bowl, mix together 1 1/2 cups pumpkin, brown sugar, cinnamon, ginger, nutmeg, cloves, allspice, and salt. Stir in maple syrup, half-and-half, and flour. Mix in eggs one at a time. Pour filling into unbaked pie shell.
Bake for 1 hour, or until center is set.
Banana Doughnuts with Banana Frosting
These are phenomenal. And they made for a wonderful addition to Christmas brunch.
Banana Doughnuts with Banana Frosting
Courtesy of Everyday with Rachael Ray
1 1/4 cups flour (gluten-free, if desired), plus more for dusting)
2 teaspoons baking powder
1/2 teaspoon salt
1 3/4 teaspoons ground cinnamon, divided
1 cup granulated sugar
2 eggs, at room temperature
1 3/4 cups mashed ripe bananas (4 bananas), divided
4 teaspoons pure vanilla extract, divided
1/2 cup vegetable oil
1/4 cup shortening, at room temperature
2 1/4 cups confectioners’ sugar
1/4 teaspoon fresh lemon juice
Preheat the oven to 350°F. Grease 2 nonstick, 6-count doughnut pans. In a large bowl, whisk together the flour, baking powder, salt and 1 1/2 teaspoons cinnamon. In a small bowl, whisk together the granulated sugar, eggs, 1 1/4 cups mashed bananas, 2 teaspoons vanilla and the oil. Stir the wet ingredients into the dry until just combined. Spoon the batter about three-quarters full into the prepared pans. Bake until golden and a toothpick inserted comes out dry, 12 to 15 minutes; let cool completely on a rack.
Meanwhile, in a food processor, combine the shortening, confectioners' sugar, the remaining 1/2 cup banana, 2 teaspoons vanilla and 1/4 teaspoon cinnamon, and the lemon juice. Glaze the doughnuts with the frosting.
Tuesday, December 21, 2010
Raspberry Pinwheels
Because I tend to lean toward chocolate sweets, I try to remember to include a non-chocolate sweet during the holidays. These cookies have become a favorite of mine because of how simple and tasty they are. They go perfectly with a cup of coffee or tea.
It is also very convenient because you can make the dough and freeze it ahead of time. No thawing necessary either. The dough is actually easier to slice cleanly when it's frozen.
I did manage the dough a little differently than the original recipe suggests. I divided the dough in half but then just spread the jam on each rectangular and rolled them from there. That made it so that I couldn't really slice the pinwheels very thickly without making enormous cookies, so they were baked sideways. I don't think it did anything detrimental to the texture, and it was easier that way, rather than having row after row of tiny cookies to slice and bake off. I did it that way when I made them before, so they were kind of pop-in-your-mouth cookies. But they're just as tasty this way.
I'll include the original recipe so that you can decide how you would like to do it.
Raspberry Pinwheels
Courtesy of Real Simple
3/4 cup (1 1/2 sticks) unsalted butter, at room temperature
1 8-ounce bar cream cheese, at room temperature
1/2 cup granulated sugar
1/2 teaspoon pure vanilla extract
2 cups all-purpose flour, plus more for the work surface
1/2 cup seedless raspberry jam
1 large egg, beaten
2 tablespoons turbinado sugar or coarse sanding sugar
Using an electric mixer, beat the butter, cream cheese, and granulated sugar until fluffy. Beat in the vanilla. Reduce the mixer speed to low and gradually add the flour, mixing until just incorporated.
Turn the dough onto a floured work surface and gently knead it 2 to 3 times, just to bring it together. Form the dough into two 1-inch-thick squares. Wrap in plastic wrap and refrigerate for 1 hour.
On a lightly floured piece of parchment, roll one of the dough squares into a 9-by-12-inch rectangle. Spread half the jam over the dough. Cut the dough crosswise into thirds, making three 9-by-4-inch rectangles. Starting from a long side of each rectangle, roll into logs. Wrap in wax paper and refrigerate until firm, at least 30 minutes. Repeat with the remaining dough.
(To freeze: Instead of refrigerating the logs, freeze them for up to 2 months. To bake, follow the recipe instructions, cutting and baking the dough from frozen, and using the upper end of the time range.)
Heat oven to 350°F. Slice the logs into 1-inch pieces and place on parchment-lined baking sheets, spacing them 1½ inches apart. Brush with the egg and sprinkle with the turbinado sugar. Bake until golden, 20 to 25 minutes. Cool slightly on baking sheets, then transfer to wire racks to cool completely.
Store in an airtight container at room temperature for up to 1 week.
Fudgy Mocha-Toffee Brownies
I've packaged up all of these brownies in order to not eat them before I give them out as Christmas presents. These are fudgy indeed. But also light. They have a wonderful flavor, and the toffee chips on top give them a delicious extra flavor boost and some great crunch.
The batter is super dense. It was a bit of a challenge to mix since I chose to do it by hand, and I definitely needed some wet hands to press the batter into the pan. It also took a lot longer than the recipe called for. But oh my, they were worth the wait.
Edited to add: I don't know what was different about this time, but the brownie mix was far less sticky (though still very dense) and took a lot less time to bake (much closer to the recipe's baking time). *shrug*
Fudgy Mocha-Toffee Brownies
A variation on this recipe from Cooking Light
Cooking spray
2 tablespoons instant coffee granules
1/4 cup hot water
1/4 cup butter
1/4 cup semisweet chocolate chips
1 1/2 cups all-purpose flour
1 1/3 cups sugar
1/2 cup unsweetened cocoa
1 teaspoon baking powder
1/2 teaspoon salt
1 teaspoon vanilla extract
2 large eggs
1/4 cup toffee chips
Preheat oven to 350ºF.
Coat bottom of a 9-inch square baking pan with cooking spray.
Combine coffee and hot water, stirring until coffee dissolves.
Combine butter and chocolate chips in a small microwave-safe bowl. Microwave at high 1 minute or until butter melts; stir until chocolate is smooth.
Lightly spoon flour into dry measuring cups; level with a knife. Combine flour, sugar, cocoa, baking powder, and salt in a large bowl, stirring with a whisk. Combine coffee mixture, butter mixture, vanilla, and eggs in a medium bowl, stirring with a whisk. Add coffee mixture to flour mixture; stir just until combined. Spread evenly into prepared pan. Sprinkle evenly with toffee chips. Bake at 350º for 35-40 minutes or until a toothpick comes out clean near the edge of the pan. Cool on a wire rack.
Note: Store leftover brownies in an airtight container for up to a week or wrap tightly in aluminum foil and freeze for up to four months.
Rice Petit Fours
I have to keep reminding myself that I'm giving these to people for Christmas... Because I can't stop eating them. I've always loved Rice Krispies Treats, so adding a layer of melted bittersweet chocolate is dangerous. In the most delicious way.
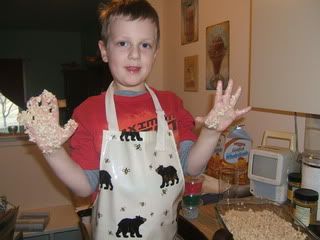
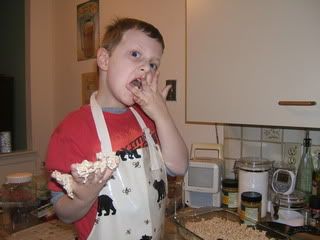
The best part of this recipe? It was Benjamin's suggestion, and he helped me make them. We had an awesome time. As you can see, especially once we were done pressing the rice mixture into the pan (done, of course, with a chef's best tools: clean hands).
Rice Petit Fours
Courtesy of Food Network Magazine
3 tablespoons unsalted butter
1 (10-ounce) package marshmallows
6 cups Rice Krispies
12 ounces bittersweet chocolate, melted
Nonpareils
Melt butter and marshmallows in a saucepan over low heat. Remove from the heat and stir in Rice Krispies. Press into a 9-by-13-inch baking pan. Spread with chocolate and sprinkle with nonpareils, then let harden. Cut into small squares.
Christmas Chocolate Bark
This was a tasty addition to this year's holiday baking. Some of my layers of chocolate came apart when I was cutting up the bark, and my M&Ms had a very hard time staying put, but the pieces that had all the elements were well worth the work. I'm going to give this batch away as Christmas presents, and I'm thinking another batch will be in order for the friends we'll be seeing the week between Christmas and New Year's. I have some candy bowls to fill...
Christmas Chocolate Bark
Courtesy of BakedBree.com
1 (12-ounce) package semi-sweet chocolate chips
1 (12-ounce) package white chocolate chips
2 cups Rice Krispies
Candy canes, crushed
Red and green M&Ms
Melt the semi-sweet chocolate in a double boiler over simmering water. Spread it out on a parchment lined baking sheet in a thin layer. Sprinkle the top with Rice Krispies. Put the bark in the fridge to set up.
Meanwhile, melt the white chocolate in a double boiler over simmering water. Pour the white chocolate over the chilled semi-sweet chocolate layer and spread it out. Sprinkle M&Ms and crushed candy canes on top. Put it back in the fridge until it sets up and hardens, about 30 to 45 minutes. Break apart the chocolate bark. You can either do this by hand, or you can use a sharp knife and cut it into squares.
Apple Cider Doughnuts
This is the second time I've tried making these doughnuts, but the dough is always too sticky to actually cut out anything even remotely resembling a doughnut. The first time it was because I didn't measure out the "applesauce" mixture properly. This time, I think it's because I didn't simmer it down enough.
I'll try again, but for this time, I'm dubbing this incarnation "apple cider fritters" since I just ended up dropping them into the frying oil using an ice cream scoop and then cooling/glazing/dusting them according to the recipe. They're tasty in this form (and were in the first form), so at least if I mess up again, I'll know I'll have a good product.
I'm adding the original recipe in the hopes that you all are more successful than I've been. Here are what my fritters looked like though:
Apple Cider Doughnuts
Courtesy of Food Network Magazine
2 red apples, such as Cortland or McIntosh
2 1/2 cups apple cider
3 1/2 cups all-pourpose flour, plus more for dusting
4 teaspoons baking powder
1/4 teaspoon baking soda
3 1/2 teaspoons ground cinnamon
1 teaspoon salt
1/4 teaspoon freshly grated nutmeg
1 2/3 cups granulated sugar
3 tablespoons vegetable shortening
1 large egg plus 1 egg yolk
1/4 cup buttermilk
1 teaspoon vanilla extract
1/4 cup confectioners' sugar
Vegetable oil, for frying
Core and coarsely chop the apples (do not peel). Combine with 1 1/2 cups cider in a medium saucepan over medium heat; cover and cook until softened, about 8 minutes. Uncover and continue cooking until the apples are tender and the cider is almost completely reduced, about 5 minutes. Puree with an immersion blender or in a food processor until smooth. Measure the sauce; you should have 1 cup. (Boil to reduce further, if necessary.) Let cool slightly.
Whisk the flour, baking powder, baking soda, 1 1/2 teaspoons cinnamon, salt and nutmeg in a medium bowl.
Beat 2/3 cup granulated sugar and the shortening in another bowl with a mixer on medium speed until sandy. Beat in the egg and yolk, then gradually mix in the applesauce, scraping the bowl. Beat in half of the flour mixture, then the buttermilk and vanilla, and then the remaining flour mixture. Mix to make a sticky dough; do not overmix.
Scrape the dough onto a lightly floured sheet of parchment paper and pat into a 7-by-11-inch rectangle, about 1/2 inch thick. Cover with plastic wrap and refrigerate for at least 2 hours or overnight.
Meanwhile, make the glaze: Simmer the remaining 1 cup cider in a small saucepan over medium heat until reduced to 1/4 cup. Whisk in the confectioners' sugar until smooth and glossy, then set aside. Mix the remaining 1 cup granulated sugar and 2 teaspoons cinnamon in a shallow bowl; set aside for the topping.
Heat 2 inches of vegetable oil in a large heavy-bottomed pot over medium-high heat until a deep-fry thermometer registers 350°. Line a baking sheet with paper towels. Cut the chilled dough into 12 rounds, using a floured 2 1/2- or 3-inch biscuit cutter, then cut out the middles with a 1-inch cutter (or use a doughnut cutter). Slip 2 or 3 doughnuts at a time into the hot oil and fry until golden brown, 1 to 2 minutes per side, adjusting the heat as needed. Transfer to the paper towels to drain.
Dip one side of each doughnut in the cider glaze, letting the excess drip off; dip just the glazed side in the cinnamon-sugar or roll all over in cinnamon-sugar, if desired. Serve warm.
Ribollita
I thoroughly enjoy this soup. The bread in the bottom is such a nice little tasty surprise.
Ribollita
Courtesy of Giada De Laurentiis
1/4 cup extra-virgin olive oil, plus some for drizzling on bread
1 onion, chopped
1 carrot, chopped
4 ounces pancetta, chopped
2 cloves garlic, 1 minced and 1 whole
1 teaspoon salt
1 teaspoon freshly ground black pepper
1 tablespoon tomato paste
1 (15-ounce) can diced tomatoes
1 pound frozen spinach, thawed and squeezed dry
1 (15-ounce) can cannelloni beans, drained
1 tablespoon herbs de Provence
3 cups chicken stock
1 bay leaf
1 (3-inch) piece Parmesan rind
4 to 6 ciabatta rolls, halved lengthwise or 1 loaf, sliced
Grated Parmesan, for serving
Heat the oil in a heavy large pot over medium heat. Add the onion, carrot, pancetta, minced garlic, salt, and pepper. Cook until the onion is golden brown and the pancetta is crisp, about 7 minutes. Add tomato paste and stir until dissolved. Add tomatoes and stir, scraping the bottom of the pan with a wooden spoon to release all the brown bits. Add the spinach, beans, herbs, stock, bay leaf, and Parmesan rind. Bring the soup to a boil, reduce heat and simmer for 30 minutes.
Meanwhile, preheat the oven to 350°F.
Drizzle the ciabatta halves with olive oil. Toast until golden brown, about 5 minutes. Remove from the oven and rub the top of the toasts with the whole garlic clove. Place the toasts in the serving bowls and ladle the soup over the toasts. Sprinkle with Parmesan and serve immediately.
Friday, December 17, 2010
Peppermint Stick Sauce
I think I may have overcooked this a bit in an effort to completely melt the candy. The consistency reminds me of the pink slime from Ghostbusters II. But it's delicious. Especially on top of mocha ice cream. Next time, I'll just melt it mostly and then strain the remaining stubborn pieces. It may also help to heat it up a bit... Hmmmm...
Peppermint Stick Sauce
Courtesy of Taste of Home
1 1/2 cups finely crushed peppermint candies or candy canes
3/4 cup heavy whipping cream
1 jar (7 ounces) marshmallow creme
In a large saucepan, combine all ingredients. Cook over medium-low heat until mixture is smooth and candy is melted, stirring occasionally.
Pour into small airtight containers. Store in the refrigerator. Serve warm over ice cream or cake.
Friday, December 10, 2010
Garam Masala-Chocolate Gingerbread
Oh. My. Goodness. These are phenomenal. I was a little curious about how the garam masala would blend with the other flavors. So, of course, I had to try making them. We had also watched the last season of The Next Food Network Star when Aarti Sequeira won, so I was excited to try out one of her recipes. If you like Indian food, these are absolutely for you. Even if you've never had Indian food, these are a delicious twist on tradition gingerbread.
I would definitely suggest waiting to have them until they've sat for a few hours. The ones I had straight out of the oven were good, but the ones I've had today are seriously awesome. The flavors have had time to blend, and it's worth the wait.
Garam Masala-Chocolate Gingerbread
Courtesy of Aarti Sequeira
3 cups all purpose flour, plus for dusting
2/3 cup Dutch-processed cocoa powder
1 teaspoon baking soda
3/4 teaspoon fine salt
1 1/2 teaspoons garam masala (Indian spice blend)
12 tablespoons unsalted butter, at room temperature (1 1/2 sticks)
3/4 cup light brown sugar
1 tablespoon freshly grated ginger
1 large egg, lightly beaten
1/2 cup molasses
Chocolate Glaze, recipe follows
Royal Icing, recipe follows
Toasted fennel seed, dried rose petals and gold or silver dragees, for garnish
Combine the flour, cocoa powder, baking soda, salt, and garam masala in a large bowl. Set aside.
Add the butter to the bowl of a stand mixer fitted with a paddle (or in a large bowl if using a hand mixer). Beat on medium-high speed until the butter is smooth, about 1 minute. Add the sugar and ginger; continue to beat over medium-high speed until light and fluffy, about 4 minutes. Scrape down the sides of the bowl and beat in the egg until fully incorporated. Add the molasses and continue to beat until fully incorporated. Add the flour in 2 batches and mix on low until combined and forms a sticky dough. Divide the dough in half, wrap in plastic wrap, and pat into 2 (1/2-inch thick) rectangles. Chill for at least 2 hours and up to overnight.
Preheat the oven to 350°F and adjust racks to the bottom and top half of the oven. Line 3 to 4 baking sheets with parchment paper. Lightly dust a clean work surface with flour.
Roll each portion of the dough into a 1/4-inch thick rectangle (if the dough becomes soft, chill for a bit in the refrigerator). Cut the dough with 3-inch cookie cutters, lay on the prepared baking sheets about 1-inch apart, and chill for 10 minutes. Bake until the cookies are golden around the edges, about 12 minutes. Transfer to a rack to cool completely. Decorate, as desired, with Chocolate Glaze or Royal Icing. Garnish with toasted fennel seeds, dried rose petals, or silver dragees.
Chocolate Glaze:
6 ounces bittersweet chocolate, chopped
1 1/2 tablespoons unsalted butter
3 tablespoons corn syrup
3 tablespoons water
Combine all the ingredients in a microwave-safe bowl, cover with plastic wrap, and cook until the chocolate melts, about 1 1/2 minutes. Stir to smooth out and combine.
Royal Icing:
1 1/2 tablespoons egg white powder
3 cups confectioners' sugar
4 tablespoons water
Combine all the ingredients in a medium bowl. Beat with an electric hand mixer over medium-high speed until it forms thick and glossy peaks, about 6 minutes.
Monday, December 6, 2010
Black Bean and Chicken Chilaquiles
Eh. This was a bit on the dry side. Even though it tasted good, I've had other similar dishes that were better.
I made some substitutions since I couldn't find salsa de chile fresco (I used salsa de tomate instead) or queso blanco (I used Monterey Jack instead). I don't know if these substitutions made a huge difference in the moisture or taste level, but I'm not sure I'll try again to find out.
Black Bean and Chicken Chilaquiles
Courtesy of Cooking Light
Cooking spray
1 cup thinly sliced onion
5 garlic cloves, minced
2 cups shredded cooked chicken breast
1 (15-ounce) can black beans, rinsed and drained
1 cup fat-free, less-sodium chicken broth
1 (7 3/4-ounce) can salsa de chile fresco (such as El Pato)
15 (6-inch) corn tortillas, cut into 1-inch strips
1 cup shredded queso blanco (about 4 ounces)
Preheat oven to 450°F.
Heat a large nonstick skillet over medium-high heat. Coat pan with cooking spray. Add onion; sauté 5 minutes or until lightly browned. Add garlic; sauté 1 minute. Add chicken; cook 30 seconds. Transfer mixture to a medium bowl; stir in beans. Add broth and salsa to pan; bring to a boil. Reduce heat, and simmer 5 minutes, stirring occasionally. Set aside.
Place half of tortilla strips in bottom of an 11 x 7-inch baking dish coated with cooking spray. Layer half of chicken mixture over tortillas; top with remaining tortillas and chicken mixture. Pour broth mixture evenly over chicken mixture. Sprinkle with cheese. Bake for 10 minutes or until tortillas are lightly browned and cheese is melted.
Labels:
beans,
cheese,
chicken,
Cooking Light,
Mexican,
vegetables
Sunday, December 5, 2010
Crustless Cranberry Pie
Wow. Wow. Yeah, super wow. And so so so easy.
Oh, and that dish you see is the gorgeous pottery made by Shawna Pincus. All of her stuff rocks.
Crustless Cranberry Pie
A variation on this recipe from allrecipes.com
1 cup all-purpose flour
1 cup white sugar
1/4 teaspoon salt
2 cups cranberries
1/2 cup butter, melted
2 eggs
1 teaspoon almond extract
Preheat oven to 350°F (175°C). Grease one 9-inch pie pan.
Combine the flour, sugar, and salt. Stir in the cranberries and toss to coat. Stir in the butter, beaten eggs, and almond extract. If you are using frozen cranberries, the mixture will be very thick. Spread the batter into the prepared pan.
Bake for 40 minutes, or until a wooden pick inserted near the center comes out clean. Serve warm with whipped cream or ice cream.
Tangy Asian Meatballs
Very tasty and easy Asian dish. I definitely suggest only cooking them in the crockpot for 3 hours. The only review on the site where I found the recipe complained about the meatballs being overcooked when they were cooked for 5 hours, and mine were perfectly done at 3 hours.
And the best part? Benjamin asked for seconds. Unexpected kid-friendly meal score!
Tangy Asian Meatballs
Courtesy of All You
1 pound ground pork
1/3 cup panko bread crumbs
3 scallions, white and light-green parts, chopped
1 large egg
1 tablespoon soy sauce
1 tablespoon finely chopped fresh ginger
2 cloves garlic, finely chopped
1/2 cup barbecue sauce
1/4 cup jarred Chinese plum sauce or duck sauce
2 tablespoons hoisin sauce
Combine pork, panko, scallions, egg, soy sauce, ginger and garlic in a large bowl; mix gently but thoroughly with your fingers. Roll into 1-inch balls.
Mist slow cooker with nonstick cooking spray. Add meatballs. In a small bowl, whisk together barbecue sauce, plum sauce and hoisin sauce; pour over meatballs. Gently stir to coat.
Cover and cook on low until meatballs are cooked through, 3 to 5 hours.
Saturday, December 4, 2010
Bread Machine Panettone
This doesn't quite live up to the other panettone I've had, but it's quite tasty. And it's certainly a hell of a lot easier to make than the other panettone recipes I've looked at in the past. While it is still quite tasty toasted with butter, I actually prefer it cut fresh off the loaf.
I read the reviews and did double the quantity of sugar and dried fruit. I think next time I'll also stick to all smaller fruit. I used dried cranberries, dried currants, dried orange rind, and dried cherries. The dried cherries were a lot larger and didn't incorporate as well as the other fruits.
Panettone Christmas Bread for the Bread Machine
A variation on this recipe from food.com
3/4 cup water
1/4 cup butter, softened
2 eggs, beaten
1 1/2 teaspoons vanilla extract
3 1/4 cups flour
4 tablespoons sugar
2 tablespoons powdered milk
1 1/2 teaspoons salt
2 teaspoons yeast
1 cup chopped mixed dried fruit (this is not to be added in until the add in beep)
Add all ingredients in order giving except the fruit.
Add fruit in on the "add in" beep on "sweet bread" setting on "light crust".
Coffee Cordials
Wow. These totally surprised me. I made them because they sounded interesting, I wanted to bring a hostess gift to a party I was going to, and I had all of the ingredients on hand. They're perfect little after-dinner treats.
The kids are a little annoyed that they can't have any since Jonathan and I have been raving over them, but oh well. Sometimes Mommy and Daddy need treats of their own.
Coffee Cordials
Courtesy of Everyday with Rachael Ray
1 1/2 sticks (6 ounces) unsalted butter, softened
1 cup brown sugar
2 tablespoons plus 1/4 teaspoon instant espresso powder
1 large egg
2 teaspoons baking powder
1 teaspoon pure vanilla extract
1/4 teaspoon plus 1 pinch salt
2 1/4 cups flour
1 1/4 cups confectioners' sugar
4 teaspoons whiskey
36 chocolate-covered espresso beans
Position racks in the upper and lower thirds of the oven and preheat to 375°F. Line 2 large cookie sheets with parchment paper. Using an electric mixer, beat the butter, brown sugar and 2 tablespoons espresso powder at high speed until fluffy. Beat in the egg, baking powder, vanilla and 1/4 teaspoon salt at medium speed. Beat in the flour and 1/2 cup confectioners' sugar at low speed.
Roll the dough into 1-inch balls and place 2 inches apart on the prepared cookie sheets. Using a glass with a flat bottom, flatten the balls 1/3 inch thick. Bake, switching and rotating the pans halfway through, until just soft in the center, 12 to 15 minutes.
Meanwhile, stir together the remaining 3/4 cup confectioners' sugar, 1/4 teaspoon espresso powder, 1 pinch salt and the whiskey. Using a pastry brush, coat the hot cookies with the glaze; press a chocolate espresso bean in the center of each cookie, then transfer the cookies to a rack to cool completely.
Baked Brie
I found this recipe that suggested halving a brie round and putting walnuts in the middle. Since I'm not a giant nut fan, I decided to try spreading a layer of apricot jam instead. YUM. It's a perfect appetizer for the holiday season. Especially when you fashion a swanky little puff pastry bow on top.
Baked Brie
A variation on this recipe from allrecipes.com
1/2 (17.5 ounce) package frozen puff pastry, thawed
1 (8 ounce) wheel Brie cheese
2-3 tablespoons apricot jam
Preheat oven to 350°F (175°C). Lightly grease a 9 inch pie pan.
Slice the wheel of Brie in half, horizontally, so that the halves are two, flatter wheels of Brie. Lay the puff pastry in the pie pan. Place half of the Brie (rind-side down) onto the pastry dough. Spread jam evenly over the top. Place the other half of the Brie (rind-side up) over the jam. Bundle the pastry dough around the Brie.
Bake for 15 to 20 minutes. Let cool for 5 minutes before serving.
Friday, December 3, 2010
Croquembouche
For Jillian's 3rd birthday party, I decided to be a little ambitious and try my hand at a croquembouche. It was definitely labor-intensive. It basically took me all day to make. But I'm excited to make it again.
Make sure you have the 1/2-inch tip that the puffs require when being piped out. I had a much smaller tip, and I think it would have helped my puffs to be much less lumpy had I had the bigger tip.
The fillings were very tasty. And I got around the problem of having a really small piping bag by putting the filling in large food storage bags and attaching the piping tips to snipped corners. It helped keep the mess to a minimum.
I messed up the glazing a bit since I wasn't flicking my hand around fast enough when I first started putting the glaze on. So some of the puffs were a bit on the crunchy side. By swirling my hand around in a circle at a faster rate, I could get a much lighter coating on the puffs, which tasted really good whenever I could find a puff with the proper amount of glaze.
Be very careful with the caramel. I gave myself a wicked burn on my finger when I was dipping the puffs into the caramel at one point.
Jillie didn't end up liking the croquembouche very much, but the rest of the guests did. Maybe some day she'll like when Mommy's being culinarily daring. Happy birthday, baby girl!
Croquembouche
Courtesy of Food Network Magazine
For Fillings:
1/4-ounce packet unflavored gelatin (2 1/2 teaspoons)
4 cups whole milk
2 vanilla beans
12 large egg yolks
1 cup sugar
6 tablespoons cornstarch
1/4 teaspoon salt
5 tablespoons unsalted butter
6 ounces bittersweet chocolate, chopped
1 tablespoon powdered espresso
1 1/2 cups heavy cream
For Pastry Puffs:
10 tablespoons unsalted butter, cut into pieces
1 1/2 teaspoons sugar
1/2 teaspoon salt
1 1/2 cups all-purpose flour
6 large eggs
For Caramel Glaze:
3 cups sugar
3 tablespoons light corn syrup
Prepare the cream fillings: Sprinkle the gelatin over 1/4 cup cold water in a bowl and set aside to bloom.
Place the milk in a pan. Halve the vanilla beans lengthwise; scrape out the seeds with a paring knife, then add the seeds and pods to the milk. Bring to a simmer, then cover and remove from the heat.
Whisk the egg yolks, sugar, cornstarch and salt in a medium bowl until smooth.
Remove the vanilla pods from the milk. Gradually whisk one-third of the warm milk into the egg mixture.
Whisk the egg mixture into the remaining milk in the pan. Cook over medium heat, whisking constantly, until the mixture boils and thickens, 6 minutes. Continue boiling until the mixture is custard-like, 3 minutes.
Remove the pan from the heat. Slice the butter into pieces and whisk into the custard, then stir in the gelatin mixture.
Microwave the chocolate until melted, 2 to 3 minutes, stirring. Mix 2 tablespoons hot water with the espresso. Transfer half of the cream filling to a bowl, then stir in the chocolate and espresso.
Transfer the remaining cream filling to another bowl. Press plastic wrap directly onto the surface of the chocolate and vanilla creams and refrigerate until cold and firm, at least 2 hours.
When ready to fill the puffs, whip the heavy cream to soft peaks with a mixer. Fold half into the vanilla cream filling and half into the chocolate filling.
Transfer each filling to a large pastry bag with a 1/4-inch tip and set aside. (To do this cleanly, cuff the open end of the pastry bag over your hand.)
While the fillings chill, make the pastry puffs: Preheat the oven to 450 degrees. Bring 1 1/2 cups water, the butter, sugar and salt to a simmer in a saucepan over medium heat, stirring to melt the butter.
Remove from the heat and stir in the flour with a wooden spoon to make a paste. Return to the heat and cook, stirring constantly, until the paste is shiny and pulls away from the pan, 6 to 7 minutes. Cool slightly.
Transfer the paste to a stand mixer and beat with the paddle attachment on medium-low speed to cool, 1 minute. Beat in the eggs one at a time. Scrape down the sides of the bowl as needed.
Transfer the dough to a large pastry bag with a 1/2-inch tip. Line 2 baking sheets with parchment paper, dabbing a bit of dough under the corners to keep the paper in place. Pipe 1 1/2-inch balls of dough onto the paper (about 48 total).
Smooth the dough peaks with a wet finger. Bake until puffed, 15 to 20 minutes, then lower the temperature to 350 degrees and bake until golden, 15 minutes. Turn off the oven; keep the puffs inside 10 minutes to dry out. Pierce each puff with a dry piping tip; transfer to a rack to cool.
(Unfilled puffs can be frozen for up to a week. To re-crisp, thaw, then brush with a beaten egg; bake 5 minutes at 350°F.)
To assemble: Fill half of the puffs with chocolate cream and half with vanilla: Insert the tip of the pastry bag into the hole and squeeze until full. Chill the filled puffs 30 minutes before assembling the tower.
Make the caramel: Mix the sugar, corn syrup and 1 cup water in a saucepan, cover and bring to a boil over high heat; don't stir. Uncover and boil, swirling the pan, until the syrup turns deep amber, 20 minutes.
Immediately dip the bottom of the saucepan in a large bowl of ice water for a few seconds to stop the cooking.
Transfer the caramel to a liquid measuring cup and cool slightly (it should still be liquid). Be careful-the caramel will still be hot!
Draw a 7-inch circle on parchment paper. Partially dip each filled puff into the caramel and let the excess drip off. Arrange the puffs around the circle. If the caramel hardens, microwave until soft, 45 seconds.
Fill the base circle with more puffs for stability, then continue building a conical tower of smaller circles. Top the tower with a single puff. Line your work surface with parchment paper-the next step can be messy.
Dip the tip of a fork into the caramel and quickly wave it in circles around the tower to create a web of caramel strands. Repeat. Let set, then slide two spatulas under the paper and transfer the croquembouche to a platter. Tear off the excess paper around the base.
To serve, crack the caramel web with the back of a knife, then dismantle the tower and transfer the cream puffs to plates.
Tuesday, November 30, 2010
Turkey Noodle Soup
I did not prepare a turkey this year for Thanksgiving, but my mom gave me her turkey carcass so that I could make stock. So because I had a ton of stock in my freezer, and it's going to be raining to beat the band over the next couple of days, I thought I would turn this chicken noodle soup recipe into turkey noodle soup.
The recipe doesn't call for meat, but I'm sure it would be a wonderful addition for any of you with leftover turkey meat from Thanksgiving. And I did add some carrots for color and flavor. I also substituted some thyme for the tarragon that's called for in the original recipe since that's what I had in the garden. If you have a cold or want to take advantage of your Thanksgiving leftovers, this is a very simple and tasty option.
Turkey Noodle Soup
A variation on this recipe by Alton Brown
4 cups chicken stock, home made or store bought
3/4 cup diced onion
3/4 cup diced celery
3/4 cup diced carrots
1 tablespoon minced garlic
2 ounces dried egg noodles, cooked to al dente
1/2 teaspoon finely chopped fresh tarragon leaves
2 teaspoons finely chopped fresh parsley leaves
Bring stock to boil for 2 minutes in a large, non-reactive stockpot with lid on, over high heat. Add onion, celery, and garlic. Lower heat and simmer for 2 minutes. Add noodles and cook 5 more minutes. Remove from heat and add herbs and salt and pepper, to taste.
Saturday, November 27, 2010
Vanilla Fudge
I'm very proud to have successfully made fudge. Especially since it was a totally out of the blue thing.
Vanilla Fudge
Courtesy of Food.com
2 cups sugar
2/3 cup evaporated milk
1/3 cup milk
1/8 teaspoon salt
1/4 cup butter
1 tablespoon vanilla
Walnut pieces (optional)
Butter sides of heavy 2 quart saucepan.
In saucepan, combine sugar, milks, and salt. Cook and stir over medium-high heat to boiling. Clip on candy thermometer and cook and stir over medium-low heat to 238°F, soft ball stage.
Remove from heat, add butter and vanilla, DO NOT STIR. Cool to 110°F.
Remove thermometer. Beat with wooden spoon till fudge becomes thick and starts to lose its gloss. Pour into a buttered 8-inch pan. Score into squares. If desired, top each square with with a piece of nut.
Chocolate Fudge
I'm not a huge chocolate fudge fan (which is why I also made vanilla fudge), but I know other people are, and since we're having people over a lot over the next few days due to the holidays, I gave this a shot. It was totally a spur of the moment thing though, so I didn't add the vanilla because I had run out. And I forgot to add the salt. But it still tastes good. So woohoo.
Chocolate Fudge
Courtesy of JoyofBaking.com
2 cups granulated white sugar
2 squares (2 ounces) unsweetened chocolate, chopped
2 tablespoons light corn syrup
2/3 cup half-and-half (or light cream)
2 tablespoons unsalted butter, cut into pieces
1/8 teaspoon salt
1 teaspoon pure vanilla extract
Grease the bottom and sides of an 8x8x2 inch pan with about 1 tablespoon of room temperature unsalted butter. Set aside.
In a heavy 2 1/2 - 3 quart saucepan, place the sugar, chocolate, light corn syrup, and half-and-half. Over medium-low heat stir the ingredients, with a wooden spoon, until it comes to a boil. Cover the pan with a lid for about 2-3 minutes to allow the sides of the pan to wash themselves down and dissolve any sugar crystals. Remove lid and clamp a candy thermometer onto the side of the saucepan and, making sure it does not touch the bottom of the pan, boil the mixture gently (adjust the heat as necessary) until the temperature reaches the soft ball stage (236°F). Do not stir or shake. (Wash down the sides of the pan with a pastry brush dipped in cold water if any granules form.)
Remove from heat and drop the 2 tablespoons of butter on top of the fudge, but do not stir the butter into the fudge. Allow the fudge to cool to lukewarm (110°F). Remove the thermometer and add the vanilla extract and salt. Beat the fudge (you can do this by hand with a wooden spoon or with an electric hand mixer) until it begins to lose its shine and is nice and creamy. Pour into the prepared pan and let cool for several hours before cutting into squares.
Store and serve at room temperature.
Makes one 8x8 inch pan of fudge.
Friday, November 26, 2010
Best Ever Green Bean Casserole
Alton Brown isn't exaggerating. This is the best ever green casserole.
Best Ever Green Bean Casserole
Courtesy of Alton Brown
For the topping:
2 medium onions, thinly sliced
1/4 cup all-purpose flour
2 tablespoons panko bread crumbs
1 teaspoon kosher salt
Nonstick cooking spray
For beans and sauce:
2 tablespoons plus 1 teaspoon kosher salt, divided
1 pound fresh green beans, rinsed, trimmed and halved
2 tablespoons unsalted butter
12 ounces mushrooms, trimmed and cut into 1/2-inch pieces
1/2 teaspoon freshly ground black pepper
2 cloves garlic, minced
1/4 teaspoon freshly ground nutmeg
2 tablespoons all-purpose flour
1 cup chicken broth
1 cup half-and-half
Preheat the oven to 475°F.
Combine the onions, flour, panko and salt in a large mixing bowl and toss to combine. Coat a sheet pan with nonstick cooking spray and evenly spread the onions on the pan. Place the pan on the middle rack of the oven and bake until golden brown, approximately 30 minutes. Toss the onions 2 to 3 times during cooking. Once done, remove from the oven and set aside until ready to use. Turn the oven down to 400°F.
While the onions are cooking, prepare the beans. Bring a gallon of water and 2 tablespoons of salt to a boil in an 8-quart saucepan. Add the beans and blanch for 5 minutes. Drain in a colander and immediately plunge the beans into a large bowl of ice water to stop the cooking. Drain and set aside.
Melt the butter in a 12-inch cast iron skillet set over medium-high heat. Add the mushrooms, 1 teaspoon salt and pepper and cook, stirring occasionally, until the mushrooms begin to give up some of their liquid, approximately 4 to 5 minutes. Add the garlic and nutmeg and continue to cook for another 1 to 2 minutes. Sprinkle the flour over the mixture and stir to combine. Cook for 1 minute. Add the broth and simmer for 1 minute. Decrease the heat to medium-low and add the half-and-half. Cook until the mixture thickens, stirring occasionally, approximately 6 to 8 minutes.
Remove from the heat and stir in 1/4 of the onions and all of the green beans. Top with the remaining onions. Place into the oven and bake until bubbly, approximately 15 minutes. Remove and serve immediately.
Brussels Sprouts with Caramelized Onions
I ate so much of this dish on Thanksgiving that I got a wicked stomachache. Yes, they were that good that I couldn't stop myself.
Brussels Sprouts with Caramelized Onions
Courtesy of All You
Salt and pepper
1 1/2 pounds Brussels sprouts, trimmed
1 tablespoon extra-virgin olive oil
4 ounces pancetta, cut into thin strips
1 onion, thinly sliced
Bring a large pot of salted water to a boil. Add Brussels sprouts and cook until al dente, about 6 minutes. Drain and rinse under cold water. Pat dry and cut in half.
Warm oil in a large skillet over medium heat. Add pancetta and fry until crisp, about 10 minutes. Remove pancetta to a plate with a slotted spoon. Add onion to fat in skillet, reduce heat to medium-low and cook, stirring often, until onion is soft and browned, 15 to 18 minutes. Add Brussels sprouts to skillet and gently stir until heated through, 6 to 8 minutes. Return pancetta to skillet. Season with salt and pepper. Serve warm.
Thursday, November 25, 2010
BLT Frittata
We had this last year for Christmas breakfast with my in-laws, so I thought I'd make it this year for Thanksgiving breakfast with my mom and sister. The bottom was a smidge overdone, but it was still quite tasty.
Edited to add, 11/29/2014: Definitely don't let this set all the way before you put it in the oven. It comes out so much better if it's still jiggly on top when you put it in. Also, adding some Italian seasoning and mozzarella cheese makes it even better.
BLT Frittata
A variation on this recipe by Rachael Ray
3 tablespoons extra-virgin olive oil, 3 turns of the pan
1/4 pound sliced pancetta, chopped
4 cloves garlic, chopped
2 bundles arugula, trimmed and chopped, about 3 cups, loosely packed
1 (15-ounce) can diced tomatoes, drained
12 large eggs
1/3 cup half-and-half, eye ball it
1 teaspoon salt
Black pepper
Preheat oven to 400°F.
Heat a 12-inch nonstick ovensafe skillet over medium high heat. Add oil, pancetta, and garlic to the pan. When pancetta browns at edges and begins to crisp, add arugula. Wilt arugula, stir in tomatoes. Beat eggs together with half-and-half. Whisk in salt and pepper. Pour eggs over fillings and let eggs set. Using a spatula, raise eggs off the bottom of the skillet, allow more of the liquid egg to settle. When the frittata has set, transfer to oven and cook 10 to 12 minutes until top is deep golden brown. Remove the frittata and let it stand 5 minutes. Cut into wedges and serve.
Overnight Cinnamon Buns
These were part of our Thanksgiving breakfast with my mom and sister. Not surprised at all that these were delicious. Alton Brown does it again...
I put the leftovers in the freezer, and I'm really hoping they defrost and reheat well. I just couldn't bring myself to throw any of them away.
Edited to add: I reheated these a couple of days after we had them the first time, and it was totally successful. 350°F for about 25 minutes. Woot!
Edited to add (again, 2/14/13): When I went to make these yesterday, I discovered I only had active dry yeast instead of instant. So before putting any of the ingredients together, I bloomed the yeast in 1/2 cup warm water (110°F-115°F) and decreased the amount of buttermilk to 1/2 cup. The only difference I noticed was that I needed only a little bit more flour during the kneading process. Otherwise, they were just as wonderful as I remembered them being.
Overnight Cinnamon Buns
Courtesy of Alton Brown
Dough:
4 large egg yolks, room temperature
1 large whole egg, room temperature
2 ounces sugar, approximately 1/4 cup
3 ounces unsalted butter, melted, approximately 6 tablespoons
6 ounces buttermilk, room temperature
20 ounces all-purpose flour, approximately 4 cups, plus additional for dusting
1 package instant dry yeast, approximately 2 1/4 teaspoons
1 1/4 teaspoons kosher salt
Vegetable oil or cooking spray
Filling:
8 ounces light brown sugar, approximately 1 cup packed
1 tablespoon ground cinnamon
Pinch salt
3/4-ounce unsalted butter, melted, approximately 1 1/2 tablespoons
Icing:
2 1/2 ounces cream cheese, softened, approximately 1/4 cup
3 tablespoons milk
5 1/2 ounces powdered sugar, approximately 1 1/2 cups
For the dough: in the bowl of a stand mixer with the whisk attachment, whisk the egg yolks, whole egg, sugar, butter, and buttermilk. Add approximately 2 cups of the flour along with the yeast and salt; whisk until moistened and combined. Remove the whisk attachment and replace with a dough hook. Add all but 3/4 cup of the remaining flour and knead on low speed for 5 minutes. Check the consistency of the dough, add more flour if necessary; the dough should feel soft and moist but not sticky. Knead on low speed 5 minutes more or until the dough clears the sides of the bowl. Turn the dough out onto a lightly floured work surface; knead by hand about 30 seconds. Lightly oil a large bowl. Transfer the dough to the bowl, lightly oil the top of the dough, cover and let double in volume, 2 to 2 1/2 hours.
Combine the brown sugar, cinnamon and salt in a medium bowl. Mix until well incorporated. Set aside until ready to use.
Butter a 9 by 13-inch glass baking dish. Turn the dough out onto a lightly floured work surface. Gently shape the dough into a rectangle with the long side nearest you. Roll into an 18 by 12-inch rectangle. Brush the dough with the 3/4-ounce of melted butter, leaving 1/2-inch border along the top edge. Sprinkle the filling mixture over the dough, leaving a 3/4-inch border along the top edge; gently press the filling into the dough. Beginning with the long edge nearest you, roll the dough into a tight cylinder. Firmly pinch the seam to seal and roll the cylinder seam side down. Very gently squeeze the cylinder to create even thickness. Using a serrated knife, slice the cylinder into 1 1/2-inch rolls; yielding 12 rolls. Arrange rolls cut side down in the baking dish; cover tightly with plastic wrap and store in the refrigerator overnight or up to 16 hours.
Remove the rolls from the refrigerator and place in an oven that is turned off. Fill a shallow pan 2/3-full of boiling water and set on the rack below the rolls. Close the oven door and let the rolls rise until they look slightly puffy; approximately 30 minutes. Remove the rolls and the shallow pan of water from the oven.
Preheat the oven to 350°F.
When the oven is ready, place the rolls on the middle rack and bake until golden brown, or until the internal temperature reaches 190°F on an instant-read thermometer, approximately 30 minutes.
While the rolls are cooling slightly, make the icing by whisking the cream cheese in the bowl of a stand mixer until creamy. Add the milk and whisk until combined. Sift in the powdered sugar, and whisk until smooth. Spread over the rolls and serve immediately.
Wednesday, November 17, 2010
Snickerdoodles
I don't know where snickerdoodles have been all my life, but I'm so very happy I've found them... These are awesome. I haven't had enough snickerdoodles in my life to know how they stack up against others, but I'm very happy with them.
Snickerdoodles
Courtesy of Sunset
1 cup (1/2 pound) butter, at room temperature
1 cup vegetable oil
1 1/2 cups granulated sugar, divided
1 cup powdered sugar
2 large eggs
4 1/4 cups all-purpose flour
1 teaspoon baking soda
1 teaspoon cream of tartar
1/2 teaspoon salt
1 tablespoon ground cinnamon
In a bowl, with an electric mixer on medium speed, beat butter, oil, 1 cup granulated sugar, and the powdered sugar until very smooth. Beat in eggs until well blended, scraping down sides of bowl as needed.
In another bowl, mix flour, baking soda, cream of tartar, and salt. Stir or beat into butter mixture until well blended.
In a small bowl, mix remaining 1/2 cup granulated sugar and the cinnamon. Shape dough into 1-inch balls, then roll each in cinnamon-sugar mixture. Place balls 3 to 4 inches apart on buttered or cooking parchment-lined 12- by 15-inch baking sheets.
Bake in a 375°F oven until edges of cookies are lightly browned, 12 to 15 minutes; if baking more than one pan at a time, switch pan positions halfway through baking.
Using a spatula, transfer cookies to racks to cool completely.
Truffle Pops
I have to be honest that I didn't try these... Everyone else liked them so much that I didn't get a chance to nab one. From what I could gather, they're quite rich, but that was to be expected. I enjoyed adding all of the different toppings and felt like the addition of the lollipop sticks helped make them easier to eat and more attractive for plating.
Truffle Pops
Courtesy of Giada De Laurentiis
Ganache:
8 ounces (1 1/2 cups) bittersweet (60 percent cacao) chocolate chips
3/4 cup heavy cream
1/2 teaspoon ground cinnamon
2 cups (12 ounces) bittersweet (60 percent cacao) chocolate chips
Toppings:
Finely chopped nuts, such as pistachios or walnuts
Mini-chocolate chips
Milk chocolate-toffee candy bars, such as Heath or Skor, finely chopped
For the ganache: Line a baking sheet with parchment paper. In a medium stainless steel or glass bowl, combine the chocolate chips and heavy cream. Set the bowl over a saucepan of barely simmering water and stir occasionally until the chocolate has melted and the mixture is smooth, about 6 minutes. Whisk in the cinnamon. Refrigerate the ganache until very firm, about 2 hours. Using a 1-ounce cookie scoop or a round tablespoon measure, scoop the ganache into 18 (1-inch) round pieces and arrange on the prepared baking sheet. Working quickly, with dry hands, roll the mixture into balls. Put a pop stick into each ball and freeze, stick side up, until firm, about 30 minutes.
Add the 2 cups of chocolate chips to a medium stainless steel or glass bowl. Set the bowl over a saucepan of barely simmering water and stir occasionally until the chocolate has melted, about 4 minutes.
Put the chopped nuts, mini-chocolate chips and chopped candy bars in 3 small bowls.
Dip the pops in the melted chocolate, allowing the excess chocolate to drip off, and then dip into the toppings until coated. Arrange the pops, stick side up, on the baking sheet. Refrigerate for 30 minutes until the chocolate has set. Let the pops stand at room temperature for 15 minutes before serving.
Store the pops, refrigerated, in an airtight container.
Cook's Note: If the scooped ganache is too sticky to roll into balls, put the pan in the freezer for 10 to 15 minutes to harden.
Labels:
candy,
chocolate,
dessert,
Giada De Laurentiis,
nuts
Peanut Butter Cups
This was my first attempt at peanut butter cups, and I think it was, overall, a successful experience. I used dark chocolate instead of milk, since that is what I prefer. And the filling is definitely much more goopy than the peanut butter cup filling that we're all used to. Despite the differences, they were mighty tasty. And were definitely better the longer they sat in the fridge. I will be trying another recipe when I make them again closer to Christmas, but I'm glad to know that I have this one if the other one falls flat.
Peanut Butter Cups
A variation on this recipe by Rachael Ray
8 ounces dark chocolate, chopped
4 tablespoons unsalted butter, at room temperature
3/4 cup natural peanut butter
1/2 cup honey
Place baking liners in a mini muffin tin. In a double boiler, melt the chocolate. Reserve the pot of hot water to keep the chocolate liquid, as necessary.
Place about 2 teaspoons of the melted chocolate in a baking cup, swirling to coat about halfway up the side of the cup. Repeat with the remaining cups. Refrigerate until set.
Using an electric mixer, beat the butter until fluffy, about 2 minutes. Beat in the peanut butter and honey. Transfer the mixture to a resealable plastic bag and snip off one corner.
Fill the chocolate cups about three-quarters full with the peanut butter mixture, smoothing the surface. Refrigerate for 15 minutes.
Top each peanut butter cup with melted chocolate to enclose, smoothing the surface. Refrigerate until hardened. To serve, remove the candies from the baking liners.
Wednesday, November 10, 2010
Slow-Cooking Applesauce
This tastes very similar to apple pie filling because of the cinnamon. So yeah, yum. I tripled the original recipe in order to have enough for my applesauce-loving kiddos. And I left out the brown sugar because when I made it before it tasted just a little too sweet. Using sweeter apples makes it so that you don't really need the added sugar.
Slow-Cooking Applesauce
A variation on this recipe from crockpot365.blogspot.com
4 large apples, skinned, cored, and cut in quarters
Juice from 1 lemon
1/2 teaspoon cinnamon
1 teaspoon vanilla
1/4 cup water
Place the apple pieces in your crockpot. Add the juice from the lemon and the water. Pour in the vanilla, add the cinnamon, and toss to combine.
Cover and cook on low for 4-6 hours. When the apples are super tender, mash with a potato masher or large fork.
Monday, November 8, 2010
Pesto Lasagna with Spinach and Mushrooms
I realized that I hadn't had lasagna in far too long and decided that I needed to adapt this slow-cooker recipe. I'm sure that it wouldn't be bad in the slow-cooker, but I just can't seem to bring myself to do it in there. So here's my oven version.
It's super good. I usually don't like vegetable lasagnas as much as ones with meat (particularly ones with sausage), but the pesto makes this version really tasty.
Pesto Lasagna with Spinach and Mushrooms
A variation on this recipe from Cooking Light
4 cups baby spinach
2 cups sliced cremini mushrooms
1/2 cup pesto
3/4 cup (3 ounces) shredded part-skim mozzarella cheese
3/4 cup (3 ounces) shredded provolone cheese
1 (15-ounce) carton fat-free ricotta cheese
1 large egg, lightly beaten
3/4 cup (3 ounces) grated fresh Parmesan cheese, divided
1 (25.5-ounce) bottle fat-free tomato-basil pasta sauce
1 (8-ounce) can tomato sauce
Cooking spray
1 (9-ounce) package precooked lasagna noodles (16 noodles)
Preheat oven to 375ºF.
Arrange the spinach in a vegetable steamer; steam, covered, 3 minutes or until spinach wilts. Drain, squeeze dry, and coarsely chop. Combine spinach, mushrooms, and pesto in a medium bowl, stirring to combine; set aside.
Combine mozzarella, provolone, ricotta, and beaten egg in a medium bowl, stirring well to combine. Stir in 1/4 cup Parmesan, and set aside. Combine the pasta sauce and the tomato sauce in a medium bowl.
Spread 1 cup pasta sauce mixture in the bottom of a 9x13 baking dish coated with cooking spray. Arrange 4 noodles over pasta sauce mixture; top with 1 cup cheese mixture and 1 cup spinach mixture. Repeat the layers, ending with spinach mixture. Arrange 4 noodles over spinach mixture; top with remaining 1 cup cheese mixture and 1 cup pasta sauce mixture. Place remaining 4 noodles over sauce mixture; spread remaining sauce mixture over noodles. Sprinkle with the remaining 1/2 cup Parmesan.
Cover baking dish with aluminum foil and bake for 50-60 minutes, until hot and bubbly. Remove foil and bake for another 5 minutes, until cheese is melted and started to brown. Let sit for 15 minutes before cutting and serving.
Friday, November 5, 2010
Lentil-Barley Soup
Good hearty soup. And it makes the house smell fantastic. Though the amount of dill the recipe calls for gives it a bit of a "grassy" flavor, especially when it's fresh. The recipe also only makes a pretty small amount of soup, so I'm thinking next time I'll double all of the rest of the ingredients and keep the original recipe's amount of dill in order to tone down the "grassiness".
Lentil-Barley Soup
Courtesy of Cooking Light
2 teaspoons canola oil
1 cup sliced leek
3 cups organic vegetable broth
1 cup water
3/4 cup beer
1 cup chopped carrot
1 cup chopped celery
1/2 cup chopped parsnip
1/4 cup chopped celery leaves
1/4 cup chopped fresh dill
1/4 cup uncooked pearl barley
1/2 teaspoon black pepper
1/4 teaspoon dried thyme
2 bay leaves
1/2 cup dried lentils
1/4 teaspoon salt
Heat oil in a Dutch oven over medium-high heat. Add leek to pan; sauté 2 minutes. Add broth, 1 cup water, and beer; bring to a boil. Add chopped carrot and next 8 ingredients (through bay leaves); return to a boil. Cover, reduce heat, and simmer for 15 minutes. Stir in lentils; cover and cook 30 minutes. Discard bay leaves.
Place 1 1/2 cups broth mixture in a blender. Remove the center piece of blender lid (to allow steam to escape); secure blender lid on blender. Place a clean towel over opening in blender lid (to avoid splatters). Blend until smooth. Return pureed mixture to pan, and stir in salt. Return mixture to a boil; cover, reduce heat, and simmer 10 minutes or until thoroughly heated, stirring occasionally.
Labels:
beer,
Cooking Light,
grains,
soup,
vegetables,
vegetarian
Wednesday, November 3, 2010
Apple Butter Pumpkin Pie
What a fun twist for a pumpkin pie! It was so tasty and definitely pleased my mom, who isn't usually a huge fan of pumpkin.
This was also my first pumpkin pie using a homemade crust... I like to use graham cracker crusts for pumpkin pies, but I wanted this to be totally homemade since I was using fresh pumpkin and homemade apple butter, so I went with the combination butter and shortening crust that I've used in the past. I was really pleased with the results. I'll still try making a homemade graham cracker crust at some point, but until then, I'll happily use the combination crust.
You will definitely want to put a crust protector or aluminum foil or something to make sure that the crust edges don't burn.
Apple Butter Pumpkin Pie
Courtesy of Paula Deen
1 cup apple butter
1 cup fresh or canned pumpkin
1/2 cup packed brown sugar
1/2 teaspoon salt
3/4 teaspoon ground cinnamon
3/4 teaspoon ground nutmeg
1/8 teaspoon ground ginger
3 eggs, slightly beaten
3/4 cup evaporated milk
1 unbaked 9-inch pie shell
Sweetened whipped cream, for garnish
Preheat oven to 425ºF.
Combine apple butter, pumpkin, sugar, salt and spices in a bowl. Stir in eggs. Gradually add milk and mix well. Pour into pie shell. Bake for about 40 minutes or until set.
Saturday, October 30, 2010
Spiced Pumpkin Biscuits
These are awesome. And definitely best fresh out of the oven. But what biscuit isn't? Mmmm... Pumpkin baked goods...
Spiced Pumpkin Biscuits
Courtesy of Cooking Light
9 ounces all-purpose flour (about 2 cups)
2 1/2 teaspoons baking powder
1 1/4 teaspoons pumpkin pie spice
1/2 teaspoon salt
5 tablespoons chilled butter, cut into small pieces
1/3 cup fat-free buttermilk
3/4 cup canned pumpkin
3 tablespoons honey
Preheat oven to 400°F.
Weigh or lightly spoon flour into dry measuring cups; level with a knife. Combine flour, baking powder, pumpkin pie spice, and salt in a large bowl; cut in butter with a pastry blender or 2 knives until mixture resembles coarse meal. Chill 10 minutes.
Combine buttermilk and honey, stirring with a whisk until well blended; add canned pumpkin. Add buttermilk mixture to flour mixture; stir just until moist.
Turn dough out onto a lightly floured surface; knead lightly 4 times. Roll dough into a (1/2-inch-thick) 9 x 5–inch rectangle; dust top of dough with flour. Fold dough crosswise into thirds (as if folding a piece of paper to fit into an envelope). Reroll dough into a (1/2-inch-thick) 9 x 5–inch rectangle; dust top of dough with flour. Fold dough crosswise into thirds; gently roll or pat to a 3/4-inch thickness. Cut dough with a 1 3/4-inch biscuit cutter to form 14 dough rounds. Place dough rounds, 1 inch apart, on a baking sheet lined with parchment paper. Bake for 14 minutes or until golden. Remove from pan; cool 2 minutes on wire racks. Serve warm.
Pumpkin Ice Cream
This is the the creamiest ice cream I've ever tasted. Maybe it's all the egg yolks? Or the fact that it's made with only cream? I'm not sure I could eat a whole lot of it, which is probably a good thing. But it is quite tasty.
The only change I made was to omit the bourbon. Benjamin was the one who suggested the flavor, so I figured feeding my 5-year-old ice cream with alcohol in it would be a bad idea. Plus, I'm just not a giant fan of how alcohol tastes in my ice cream.
Pumpkin Ice Cream
A variation on this recipe from Williams-Sonoma
1 cup fresh pumpkin puree or canned unsweetened pumpkin puree
1 teaspoon vanilla extract
2 cups heavy cream
3/4 cup firmly packed dark brown sugar
5 egg yolks
1/2 teaspoon ground cinnamon
1/2 teaspoon ground ginger
1/4 teaspoon salt
Pinch of freshly grated nutmeg
In a bowl, whisk together the pumpkin puree and vanilla. Cover and refrigerate for at least 3 hours or up to 8 hours.
In a heavy 2-quart saucepan over medium heat, combine 1 1/2 cups of the cream and 1/2 cup of the brown sugar. Cook until bubbles form around the edges of the pan, about 5 minutes.
Meanwhile, in a bowl, combine the egg yolks, cinnamon, ginger, salt, nutmeg, the remaining 1/2 cup cream and the remaining 1/4 cup brown sugar. Whisk until smooth and the sugar begins to dissolve.
Remove the cream mixture from the heat. Gradually whisk about 1/2 cup of the hot cream mixture into the egg mixture until smooth. Pour the egg mixture back into the pan. Cook over medium heat, stirring constantly with a wooden spoon and keeping the custard at a low simmer, until it is thick enough to coat the back of the spoon and leaves a clear trail when a finger is drawn through it, 4 to 6 minutes. Do not allow the custard to boil. Strain through a fine-mesh sieve into a bowl.
Place the bowl in a larger bowl partially filled with ice water, stirring occasionally until cool. Whisk the pumpkin mixture into the custard. Cover with plastic wrap, pressing it directly on the surface of the custard to prevent a skin from forming. Refrigerate until chilled, at least 3 hours or up to 24 hours.
Transfer the custard to an ice cream maker and freeze according to the manufacturer's instructions. Transfer the ice cream to a freezer-safe container. Cover and freeze until firm, at least 3 hours or up to 3 days, before serving. Makes about 1 quart.
Thursday, October 28, 2010
Slow-Cooking Apple Butter
This recipe is originally called "Overnight Apple Butter", but I recommend doing it during the day, if for no other reason than to be able to enjoy the aromas that fill your house more actively. This is so good. I remember my dad raving about apple butter when I was little but always thinking it sounded gross. But I'm glad I finally tried it. It's delicious and super easy to make. Which is why my dad will be getting a whole jar of it for Christmas.
The only change I made was to use nutmeg instead of mace. Before doing the grocery shopping for the ingredients, I read that mace is just the outside casing for nutmeg and is kind of expensive. So I went the cheaper route, and while I don't know what it would have tasted like with the mace, it tasted great this way.
Slow-Cooking Apple Butter
A variation on this recipe from Cooking Light
1 cup packed brown sugar
1/2 cup honey
1/4 cup apple cider
1 tablespoon ground cinnamon
1/4 teaspoon ground cloves
1/8 teaspoon ground nutmeg
10 medium apples, peeled, cored, and cut into large chunks (about 2 1/2 pounds)
Combine all ingredients in a 5-quart electric slow cooker. Cover and cook on low 10 hours or until apples are very tender.
Place a large fine-mesh sieve over a bowl; spoon one-third of apple mixture into sieve. Press mixture through sieve using the back of a spoon or ladle. Discard pulp. Repeat procedure with remaining apple mixture. Return apple mixture to slow cooker. Cook, uncovered, on high 1 1/2 hours or until mixture is thick, stirring occasionally. Spoon into a bowl; cover and chill up to a week.
Stovetop variation: Combine all ingredients in a Dutch oven. Cover and cook over medium-low heat 1 hour or until apples are very tender, stirring occasionally. Strain through a sieve as recipe instructs in Step 2. Return mixture to pan. Cook, uncovered, over medium-low heat 15 minutes or until thick, stirring frequently.
Chicken Biryani
This isn't as good as the chicken biryani I've had at Indian restaurants, but it's a good alternative if you can't get Indian food where you live or are watching your budget.
Chicken Biryani
Courtesy of Cooking Light
2 teaspoons canola oil
1 pound skinless, boneless chicken breast, cut into 1-inch pieces
1 cup chopped onion (about 1 medium onion)
1 jalapeño pepper, seeded and minced
1 teaspoon minced fresh ginger
1 1/2 teaspoons garam masala
3/4 teaspoon ground cumin
1/2 teaspoon salt
2 garlic cloves, minced
2 cups chopped plum tomato (about 2 tomatoes)
1 cup uncooked basmati rice
1/3 cup golden raisins
1 (14-ounce) can fat-free, less-sodium chicken broth
1/4 cup chopped fresh cilantro
1/4 cup sliced almonds
4 lime wedges
Heat oil in a large nonstick skillet over medium-high heat. Add chicken to pan; sauté 3 minutes. Add onion and jalapeño; sauté 3 minutes. Add ginger, garam masala, cumin, salt, and garlic; sauté 30 seconds. Add tomato, rice, raisins, and broth; bring to a boil. Cover, reduce heat, and simmer 15 minutes or until rice is tender. Stir in cilantro. Sprinkle with almonds; serve with lime wedges.
Labels:
chicken,
Cooking Light,
Indian,
nuts,
rice,
vegetables
Subscribe to:
Posts (Atom)